
Instructions for Calling an API with OAuth2
Instructions for Calling an API with OAuth2
This guide explains how to use Postman to generate an OAuth2 token via the Client Credentials flow and then use that token to call an API. All required details (e.g., token URL, client ID, client secret, scope) will be available in a separate document.
Prerequisites
- Postman Installed: Download and install Postman if you haven't already (Postman Download).
- Access to API Details: A document with the needed information will be shared via SharePoint:
- Token URL: The endpoint to generate the OAuth2 token.
- Client ID: The identifier for application registered in the authorization server.
- Client Secret: The secret key corresponding to the client ID.
- Scope: The permissions required for the API.
- API Base URL: The URL for the API.
Step 1: Generate an OAuth2 Token in Postman
-
Open Postman:
- Launch Postman and create a new request.
-
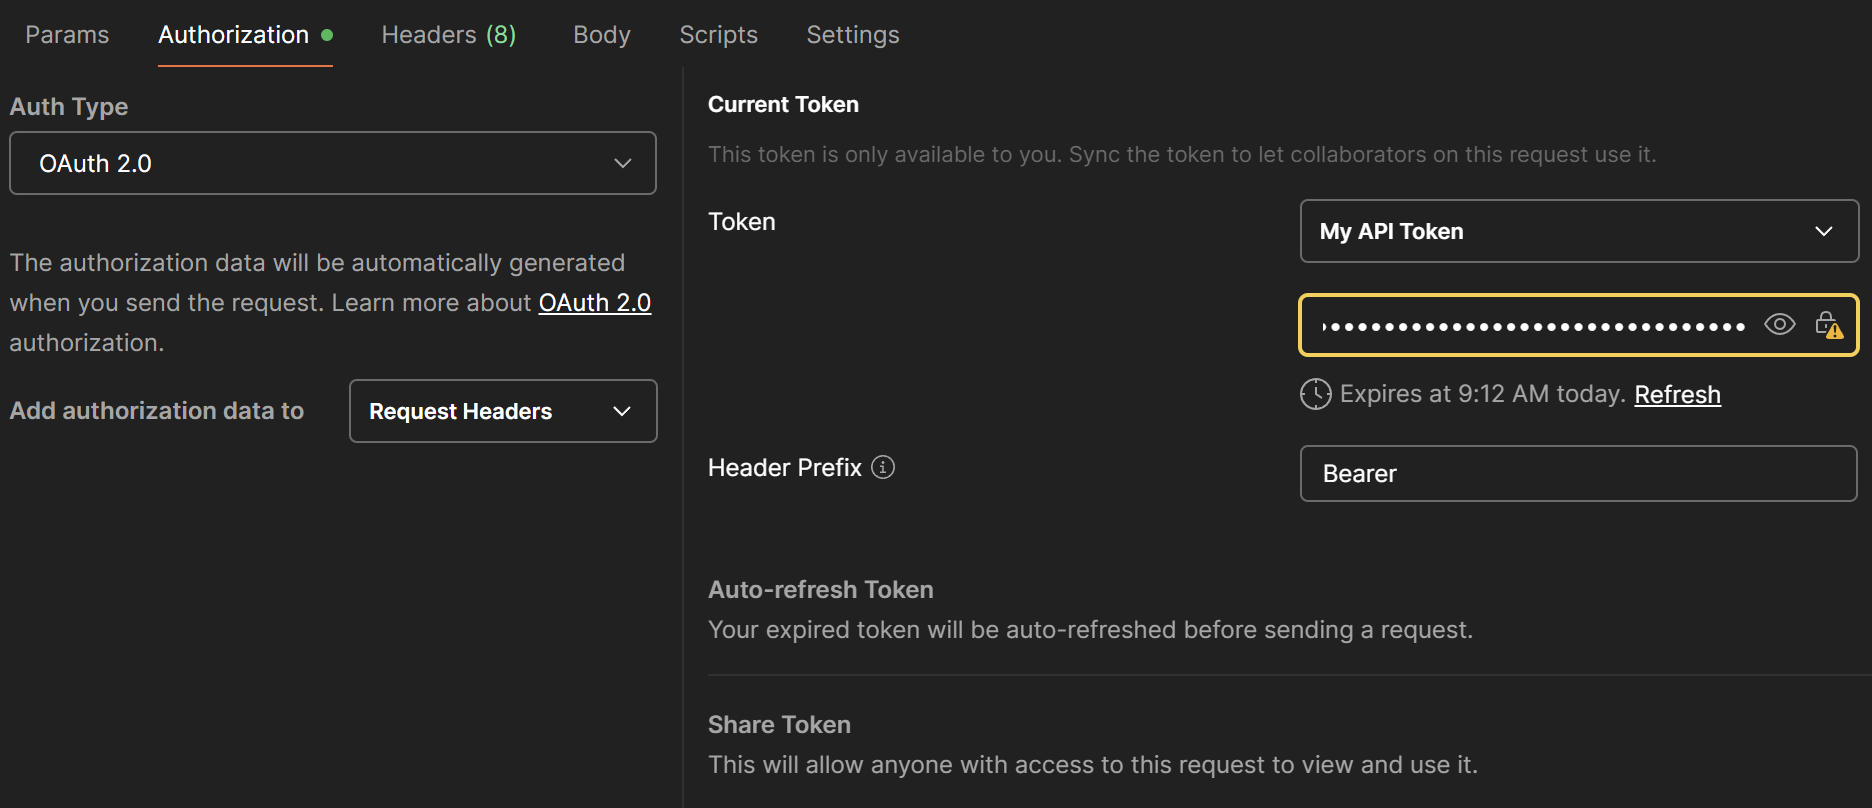
Navigate to the Authorization Tab:
- Click on the Authorization tab in the request builder.
-
-
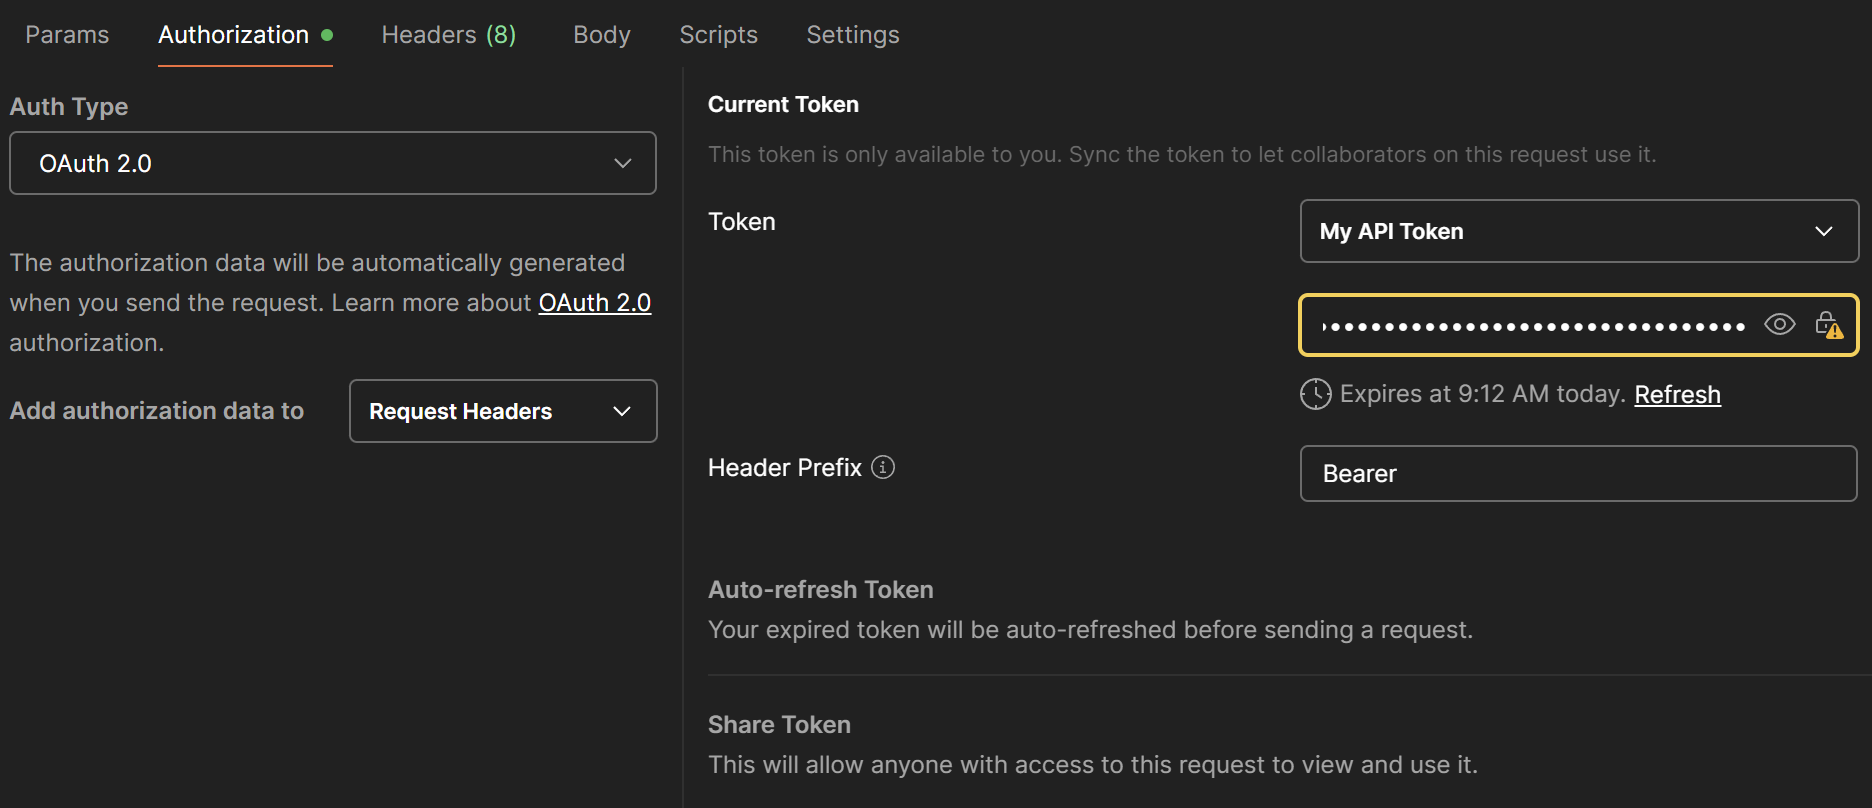
Set Authorization Type to OAuth 2.0:
- From the dropdown labeled Auth Type, select OAuth 2.0.
-
Configure OAuth2.0 Settings:
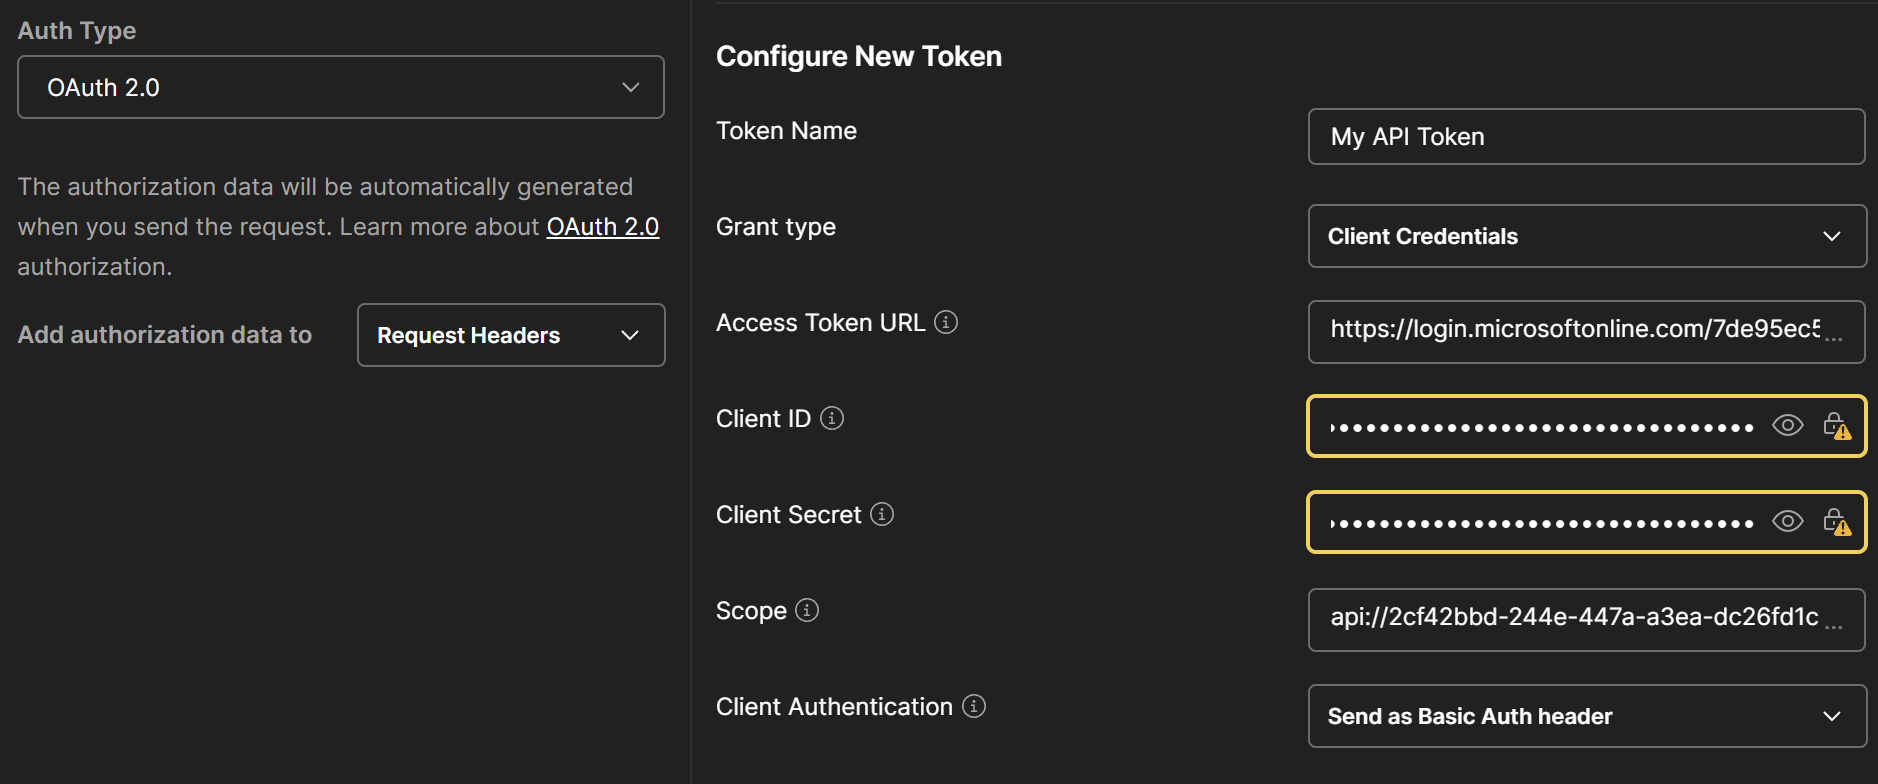
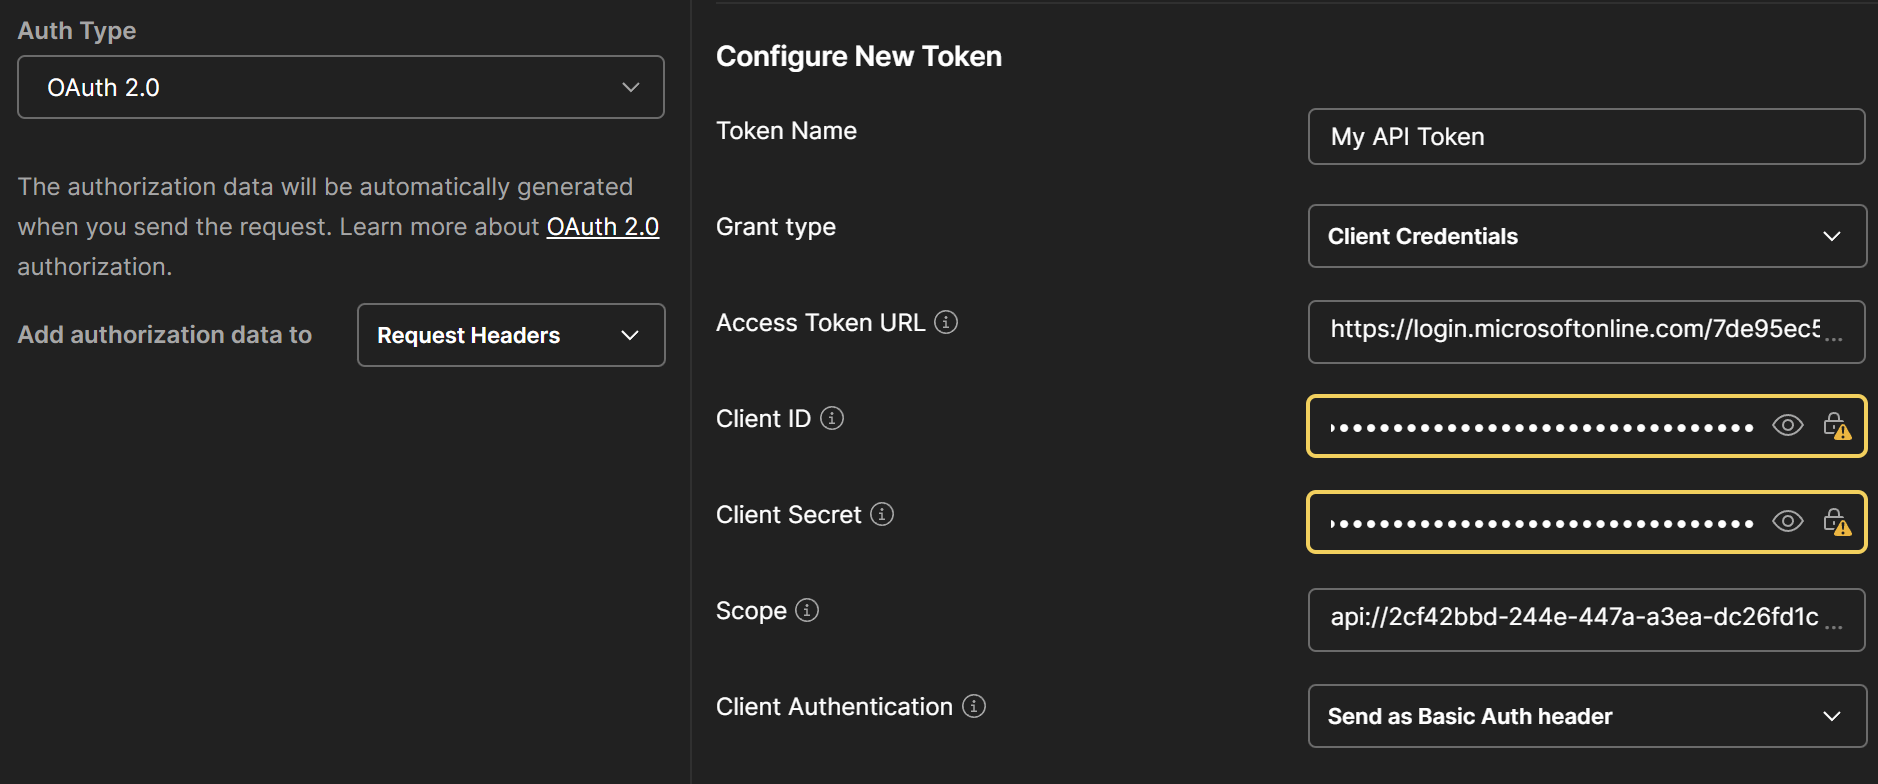
- Click Configure New Token and fill out the fields as follows:
- Token Name: Enter a name to identify this token (e.g., "My API Token").
- Grant Type: Select Client Credentials.
- Access Token URL: Paste the token URL from your document.
- Client ID: Enter the client ID provided in your document.
- Client Secret: Enter the client secret corresponding to the client ID.
- Scope: Enter the scope required for the APIs.
- Client Authentication: Select Send as Basic Auth header
-
- Click Configure New Token and fill out the fields as follows:
-
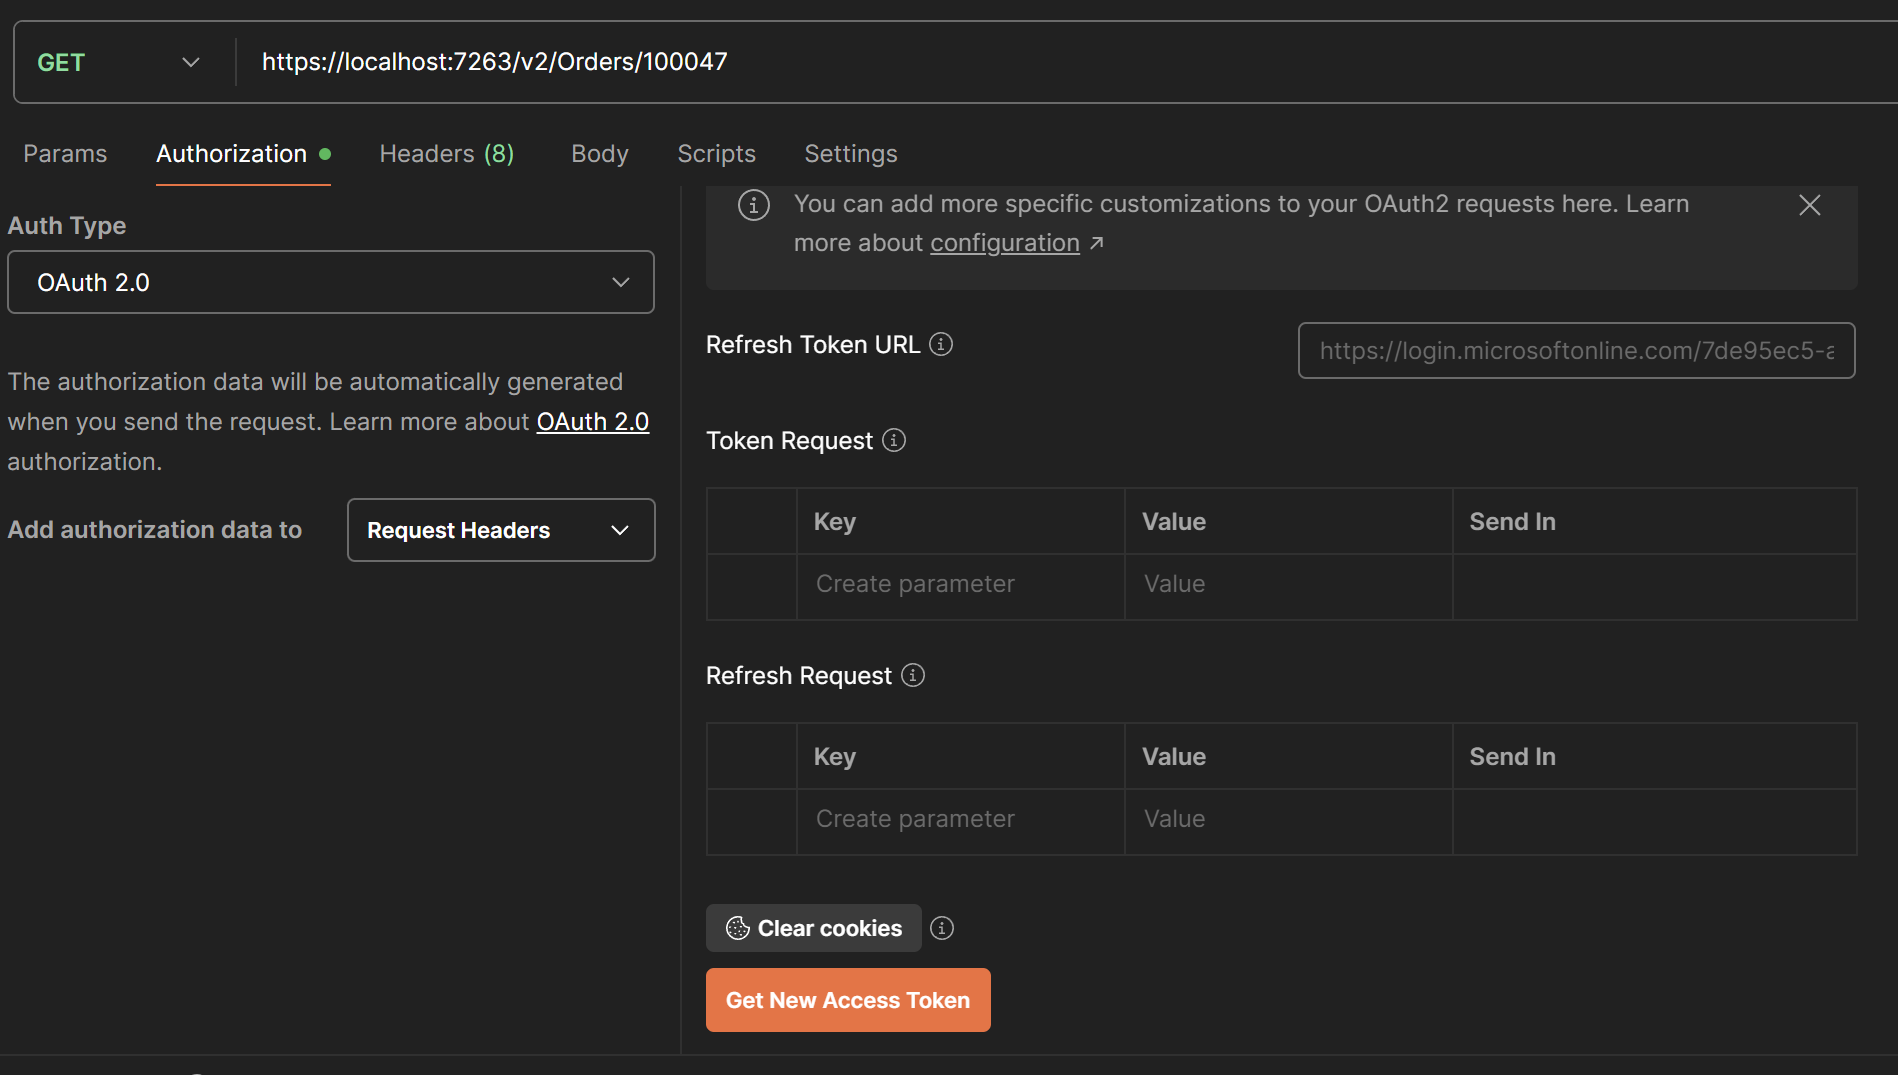
Save the Token Configuration:
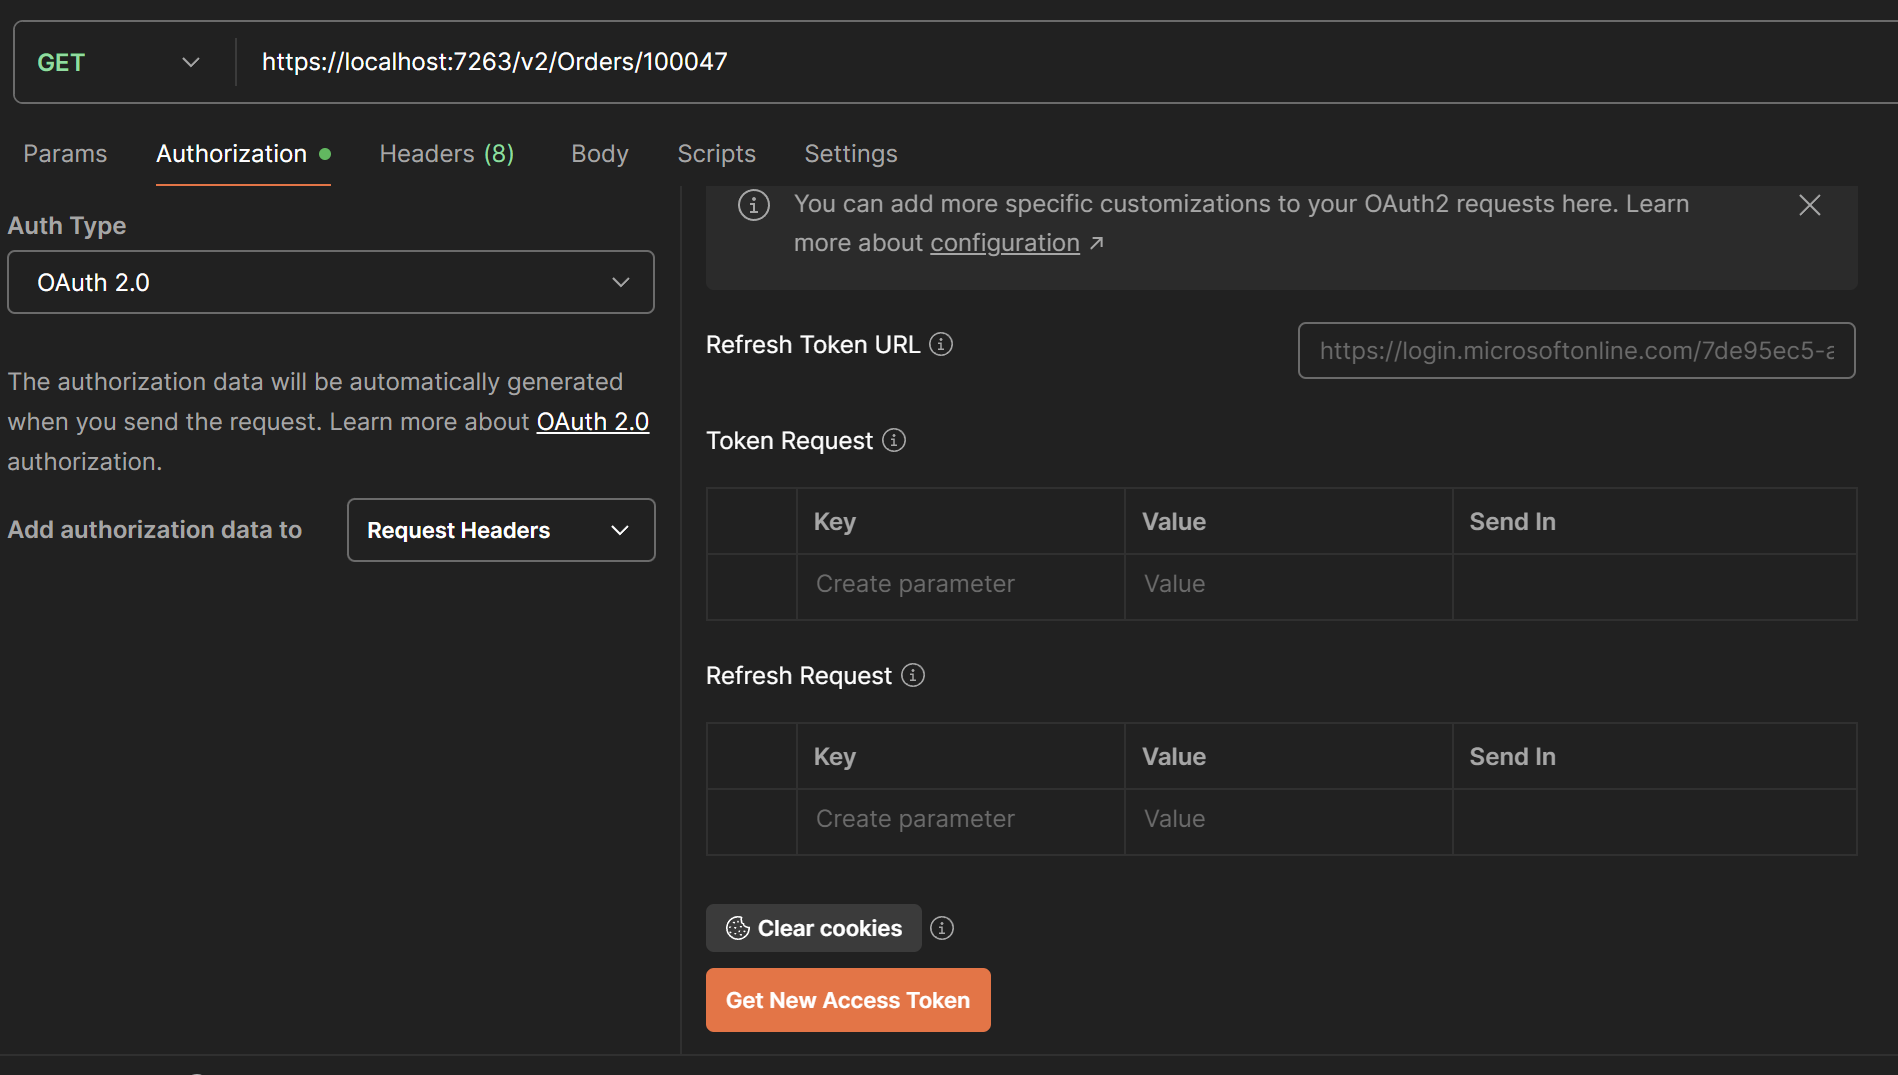
- Once you've filled in all the fields, click Get New Access Token. Postman will send a request to the token URL with the provided details.
-
-
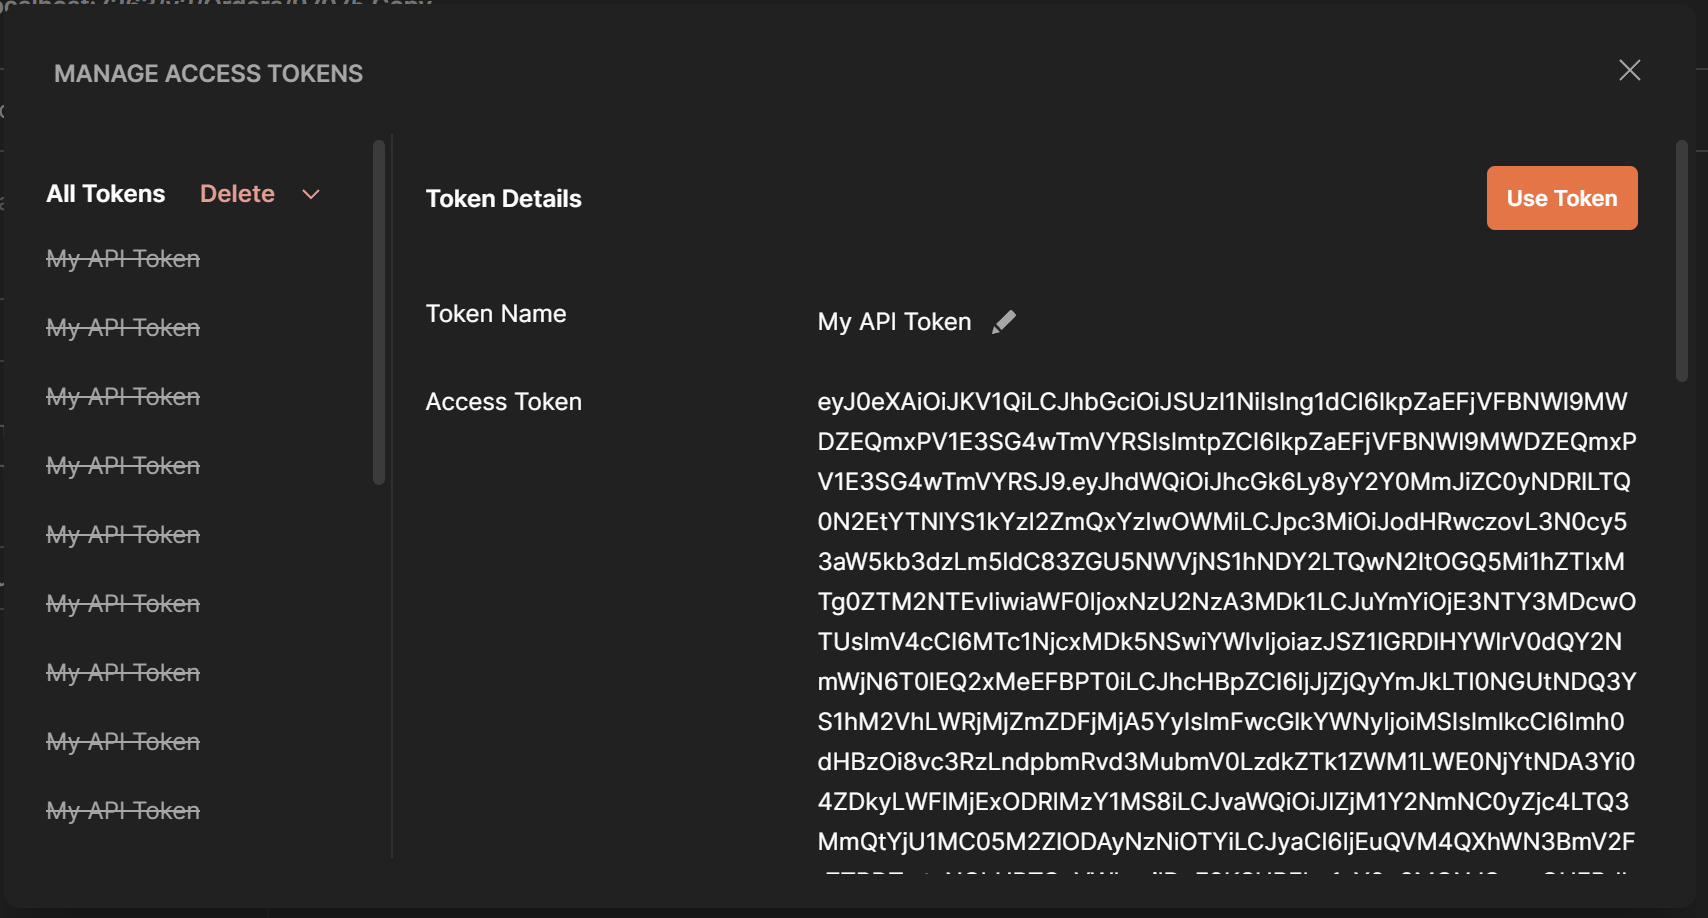
View and Use the Token:
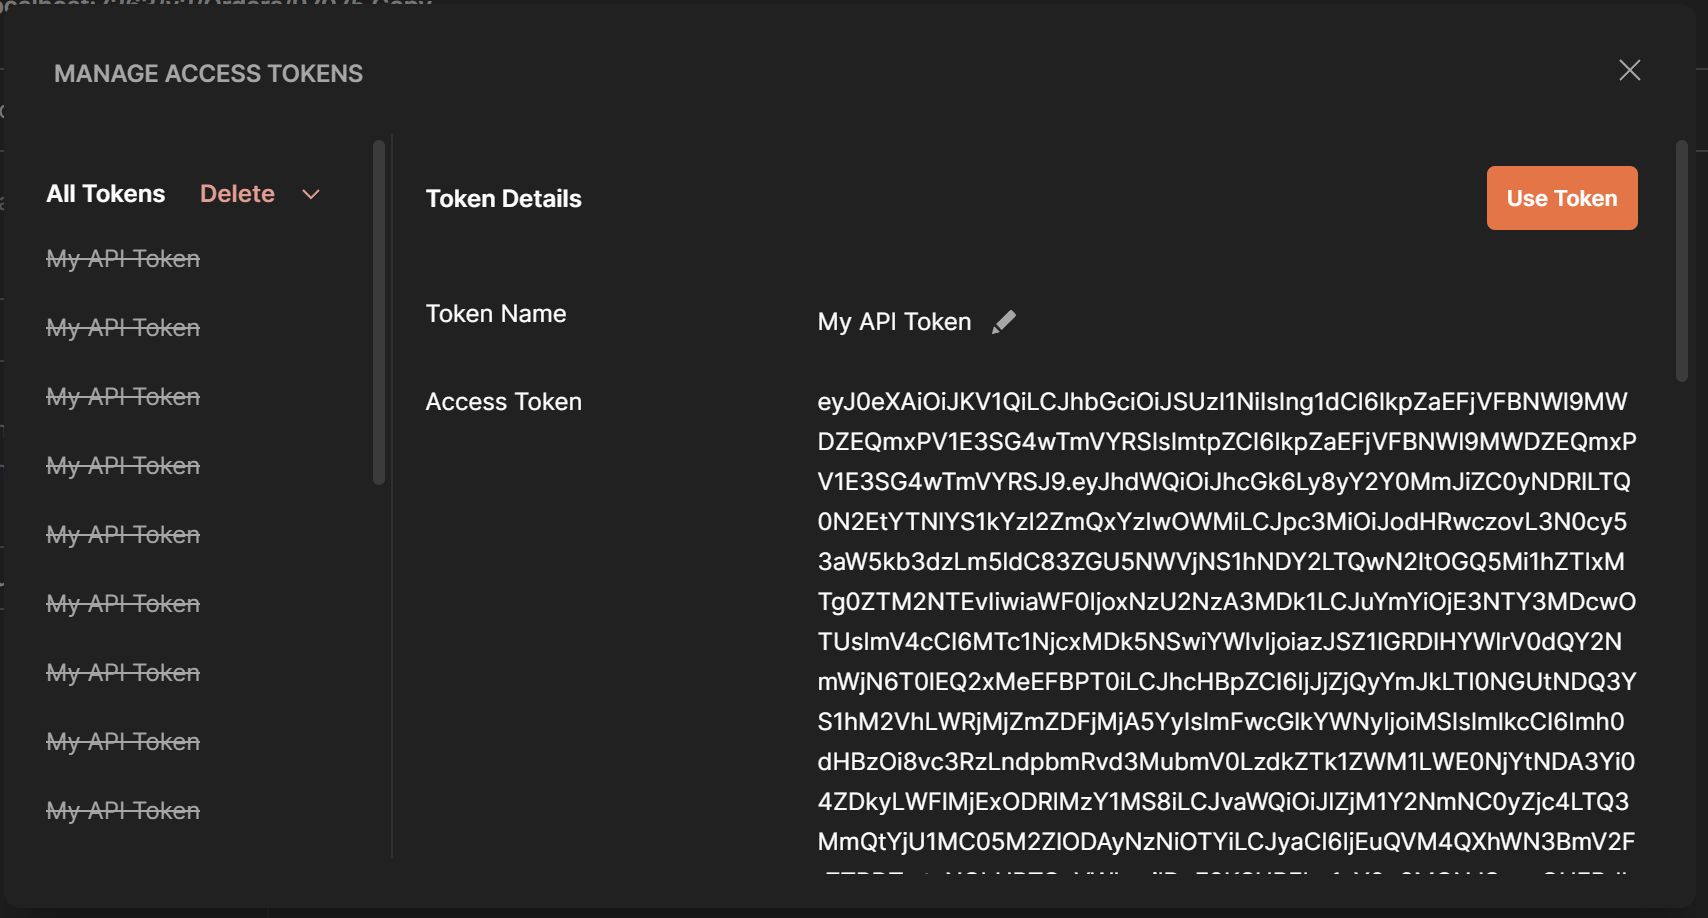
- If the request is successful, you will see an access token in the response.
- Click Use Token to attach the token to the request headers automatically.
-
Step 2: Test the API
With Postman
-
Set Up the API Request:
- In Postman, create a new request or use an existing one.
- Enter the API endpoint (e.g.,
https://api.example.com/v1/resource) in the Request URL field. - Select the HTTP method GET
-
Verify Authorization Header:
- Go to the Headers tab and confirm that the
Authorizationheader is automatically populated with the Bearer token. To see the Token make it first visible. -
Authorization: Bearer <access-token>
-
Click "Authorize":
- This will attach the token to all subsequent API requests made in Swagger.
- Go to the Headers tab and confirm that the
-
View the Response:
- Inspect the response body, headers, and status code to verify that the API call was successful.
With Swagger
-
-
Open the Swagger UI
- Navigate to the Swagger UI of your application (e.g.,
https://api.example.com/swagger).
- Navigate to the Swagger UI of your application (e.g.,
-
Locate the Endpoint:
- Browse the list of available endpoints and find the one you want to test (e.g.,
GET /v1/resource).
- Browse the list of available endpoints and find the one you want to test (e.g.,
-
Click on the "Authorize" Button:
- In the Swagger UI, locate the Authorize button (usually near the top-right corner of the page).
- A dialog box will appear asking for the token.
-
Enter the Bearer Token:
- In the input field provided, type
Bearer <access-token>
- In the input field provided, type
-
Select the Endpoint to Test:
- Expand the endpoint (e.g.,
GET /v1/resource) by clicking on it.
- Expand the endpoint (e.g.,
-
Click "Try it Out":
- This button will allow you to enter any required parameters for the request.
-
Fill in Parameters (if applicable):
- If the endpoint requires query parameters or request body data, fill in the fields as needed.
-
Send the Request:
- Click the Execute button to make the API request.
-
Inspect the Response:
- Once the request is executed, Swagger will display the following:
- Response Body: The actual data returned by the API.
- Response Headers: Metadata about the response, such as content type.
- Response Status Code: The HTTP status code (e.g.,
200 OK,401 Unauthorized).
- Once the request is executed, Swagger will display the following:
-
Verify the Results:
- Check the response to ensure the API behaves as expected.
-
Step 3: Refresh the Token (Optional)
- If the token expires, click Refresh in the OAuth2 token section of Postman.
- Alternatively, repeat Step 1 to manually generate a new token.
Key Points to Note
- Token Expiry:
- Tokens typically have a limited lifespan (e.g., 1 hour). Be prepared to regenerate them as needed.
- Security:
- Keep the client secret confidential. Do not share it.
- Scope:
- Ensure that the scope you use match what the API requires. Incorrect scopes will lead to errors.
- Error Handling:
- If token generation fails, check the following:
- The token URL is correct.
- The toke is valid.
- Client ID, client secret, and scope are correct set.
- If token generation fails, check the following: